
The Linden Sweatshirt by Grainline is almost universally acknowledged as an easy beginner level pattern; a great introduction to sewing with Knits; a basic staple pattern; a really quick sew, a.k.a. a bit of a no-brainer. So it was rather a surprise to find that sewing the Linden gave me an unexpected opportunity to try out a couple of new things!
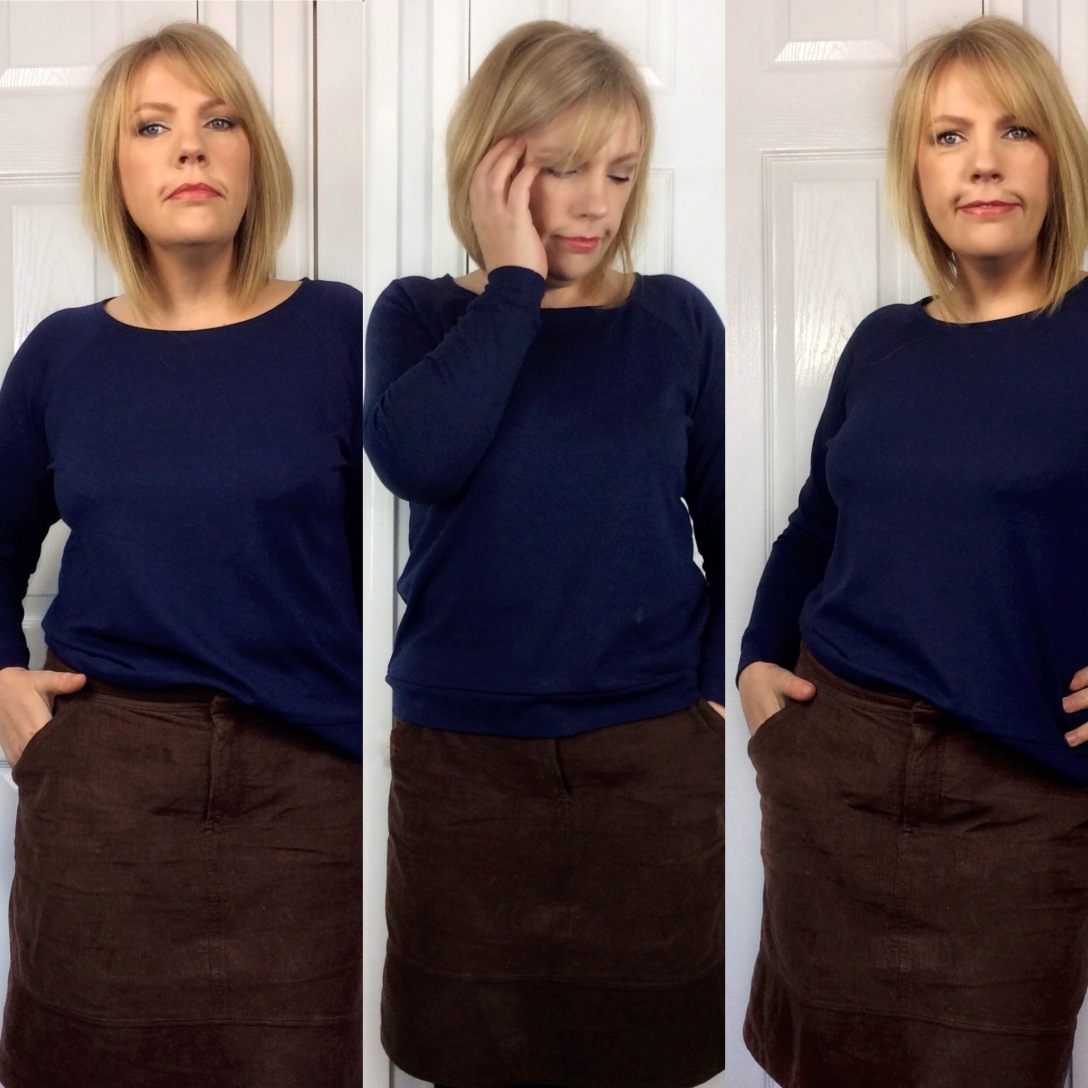
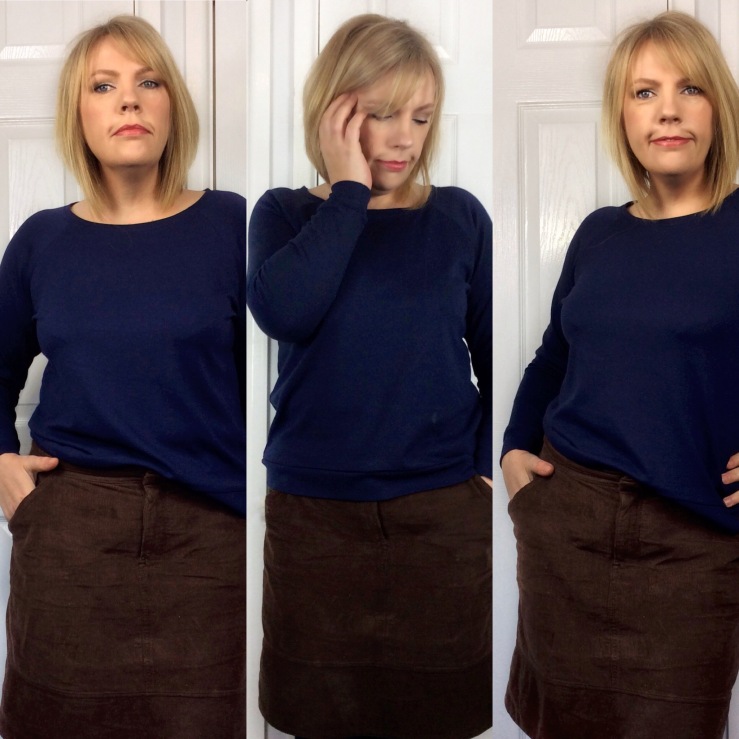
 I debated about what View to make – both feature raglan sleeves, which I love; View A is your classic sweatshirt, oversized and full length whilst View B is a cropped affair with a high-low hem. I’d initially decided on View B but it’s a fact now cemented in my brain that boxy shapes just do not suit my short height somewhat big chested stature! A quick test version confirmed that I looked like this but, y’know, without the smile 😉
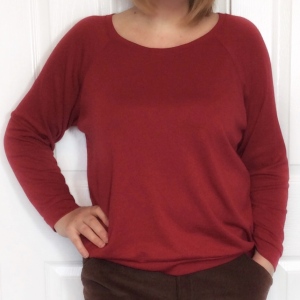
So I made up view B. I’m a D cup and, I kid you not, if I eat too many carbs or I’m hormonal, they can go up to E in the same day. Is that just me?! So I initially decided to play it safe and cut a size 14. I was using a gorgeous medium weight John Kaldor burgundy ‘Roanne’ viscose jersey from Minerva as it’s so soft but with some drape; I really wanted to avoid anything with more structure to negate the horror that is The Box. I took my usual 1.5″ off the sleeve and 2″ off the bodice pieces.
 And it was HUGE … yet I had to sew the neckband on twice because that, paradoxically, was too small. Thankfully I’d only basted it on so it wasn’t a big deal to rip it off and sew on a longer one. A quick Google search revealed I’m not the only one that has had this problem. The issue, I suspect, is down to the individuality of the knit fabric you’re using; it’s percentage and direction of greatest stretch. Which is why I decided to draft my own band pieces for my second version (see below). (This pattern requires at least 20% stretch – there’s a good post here on how to determine this).
However, once the neckband issue was resolved, I still love the top. Yeah it’s massively oversized and a slouchy batwing thing but, really, slouching around is what I do best! I wore it a lot over Christmas when I barely got off the sofa.
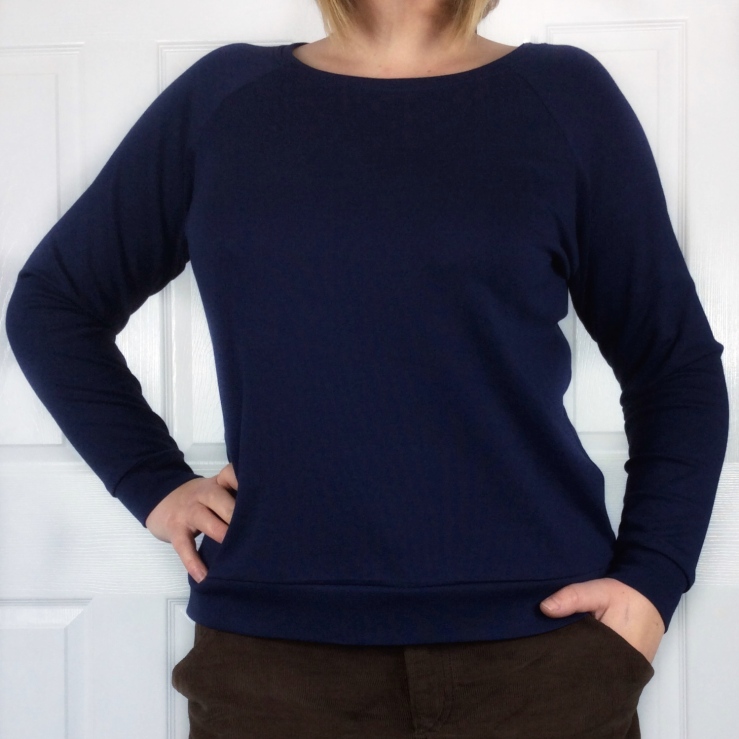
So I decided to sew it again (in the same fabric but in the French Navy colourway) only this time to do things differently. I went down two sizes and initially only cut out the bodice and sleeve pieces so I could calculate the length of my neck, cuff and hem bands later. I also decided to cut the bodice out on the single fold. I posted my reaction on doing this to my Instagram feed and it generated quite a few questions.
It was totally one of those moments where I smacked myself on the forehead *facepalm* style. Why had it taken me so long to try this!? I always trace my pattern pieces anyway so it didn’t take that much longer to trace an additional bodice piece, flip one of them over and then stick them together to create a whole. The centre join line becomes your new grainline and you can add top and bottom centre notches here (which come in useful when adding the bands later). [Edit: or see Kathleen’s alternative method in the Comments section below].
I found it took way less time to place the unfolded fabric on my cutting board (to ensure it was straight), and to pin and cut out this way. Fabrics with any drape and ‘shift’ (or pattern) I’ve always found relatively time consuming to fold; trying to ensure both layers are precisely aligned. I was also amazed at how much less fabric I used. As you may know, cutting on the fold, if you place the fabric selvage to selvage, can be wasteful (if you’re cutting on the fold and your fabric is wide enough, it’s better to fold with the selvages meeting in the middle I find). By placing my complete bodice pieces on the flat I was able to pin them side by side. One for the Win!
Once I’d sewn the bodice pieces and sleeves together, I then thought about how long the neckband should be to ensure it snapped to the body and laid flat. I found the easiest way to calculate this is to first measure the circumfrance of your neckline. I did this with a piece of string, pinning it in place at the starting point and marking the end point on the string itself…

…I then simply measured the piece of string to the marked point and multiplied this figure by 0.75 to get a measurement 25% less than the actual neckline (my fabric comfortably stretched to 25%, if your fabric has 20% stretch you’d multiply by .80 etc) and then added on the seam allowance to get the final measurement. (I also decided to increase the width of the neckband a tad). I drafted up my new neckband pattern piece according to these measurements and notched the quarter points. As directed in the pattern instructions, I then sewed the band together and attached it to the neckline matching the bodice (and sleeve) centre notches created earlier to evenly distribute it. Voila! For good measure, I topstitched it too.

For the cuffs I merely measured my wrist and added seam allowance and for the hem band I simply measured where the top would finish up around my hip and again added the S.A.
Phew, who knew I’d have so much to say about such a simple top!?
I’m so glad that I now have the Linden in my arsenal; it really is another great staple pattern and, next time, it really will be a no-brainer I can sew up in next to no time! I’m wearing it here with another great everyday Grainline pattern; their Moss Skirt. (I’ve posted on that here and here).
Until next time, happy sewing!


[…] I’ve seen so many great versions of on my Instagram feed. I’ve sewn the Linden a few times (see here) but the Hudsons, though long in my stash, were a ‘new-to-me’ […]
LikeLike
Thanks for the post and tips! I came across it while researching how to make the neckline closer to the neck. I haven’t started making my Linden yet but after seeing yours I’m thinking that maybe the neck is good as it is after all. The tip for making your own neckband is a good one though because I’m planning on using a woven panel for the front. Fingers crossed it will work out fine!
LikeLike
Hahahaha no shame love xx
LikeLike
I’m so shamed to admit I haven’t made one, will do soon though. need to find nice soft sweatshirt fabric. xxx
LikeLiked by 1 person
Aww thanks Jen xx
LikeLiked by 1 person
Aw thanks Jen xx
LikeLiked by 1 person
Lovely Lindens. My first is coming up soon, so your neckline and cutting tips will be so handy!
LikeLiked by 1 person
Thank you Clemence. You could also try stabilising your fabric with something like Sullivan’s spray Stabiliser; I was recommended to try that recently and it’s amazing!
LikeLiked by 1 person
Thank you for the tip! I have never sewn with knits before but I already have issues with cutting drapey fabric on the fold, it always seems to shift no matter how many pins I put in! I will definitely be trying this out 🙂
LikeLiked by 1 person
Ah Hila, what a lovely thing to say, thank you! 😊😚
LikeLike
Lovely tops and well done on your diligence with improving the fit. Many sewcialists will benefit from your triumph. Thanks for sharing.
LikeLiked by 1 person
Thank you Wendy!!!! You’ve made me smile! Have fun xx
LikeLiked by 1 person
This looks amazing! I’m going to have to have a go at this – armed with all your advice. I second what was said before me…. so inspiring! x
LikeLiked by 1 person
Oh my goodness Kathleen, of course you’re quite right What a brilliant idea! I may add that in to the post if you don’t mind? X
LikeLike
Thanks Regina! I’m really pleased, I hope it works out good for you! X
LikeLike
Great post Sarah. I plan to use the tips for drafting a neckband on my next knit top project. Thanks for sharing .
LikeLiked by 1 person
Cheers Linda! I’m happy and I love feeling that I’ve learned something or put something into practice for the first time! 😊
LikeLiked by 1 person
I love them both! So glad you were able to find a solution because you ended up with a couple of nice Lindens.
LikeLiked by 1 person
Yey!!! Hope it works well for you too!! X
LikeLiked by 1 person
Mirroring the pattern piece is brilliant! After my folding knit fabric fiasco this weekend I really need to try this!
LikeLiked by 1 person
Thank you Anya! Definitely better than my first effort, right?! I’m always a bit wary in case I’m stating the obvious! I’m still a bit peeved I can’t wear the cropped version but ah well!!! X
LikeLiked by 1 person
I love this navy sweater a LOT. This is exactly the type of garment I wear all the time and I have the Lark so I’m going to follow guidance for sure. When I want to make a full pattern piece as long as my paper roll is wide enough I just fold it in half – put the pattern piece on the fold and cut it out – unfold the paper and voila I have a full front (and or back) 🙂
LikeLike
Lovely sweater!! It fits you so well. Perfectly loose without swallowing you whole. And the color is lovely on you. Thank you for the pointers on the neckband. I also sometimes have issues with them due to the varying stretch of fabric 🙂
LikeLiked by 1 person
Cheers Helen!! Xx
LikeLike
This is so true! I have had problems in the past with neckline bindings being a bit too short because of stretchy fabric. Of course I never know until it is already sewn on! Better to draft your own I think 🙂 Nice sweater!
LikeLiked by 1 person
You know how to make me smile Suzy!!!! 😘 thanks lovey – although YOU are a sewing guru!!! Xx
LikeLike
That is such a handy tip for the neckline, Sarah. I had problems with my first neckband…I cheated and added a bit on, rather than unpick, but it isn´t ideal. Your method is foolproof and takes into account variations in stretch. Love your Lindens…that French navy is divine.
LikeLiked by 1 person
Sharon thank you so much for your comment, you have no idea how how that made me to read!!!!! Good luck with your next one xx
LikeLike
What a brilliant post Sarah. I’ve made many Lindens, some more successful than others. 😉 Your comments have made me re- think how I’ll make my next, especially in relation to percentage stretch of the fabric and self drafting a neckband to suit. Inspiring! 👍
LikeLiked by 1 person