

Hello sewing friends!
I recently made my young daughter a shirtdress using New Look 6884 in a ‘Cherry Crimson’ Art Gallery Fabrics chambray (see that post HERE). Whilst I’m not averse to sewing sewing buttonholes, I decided instead to use the Prym range of plastic ‘Love’ snaps, which I thought would add a fun and practical touch. I though I’d share a step-by-step tutorial on how I used them : a Snap-Chat, if you will!
Whilst in the demonstration I’m using snaps, the principle is the same for inserting rivets, jean rivets / hardware and eyelets etc., (to see kit examples, I have them in my Amazon Shop ;-)).
How to Use Prym Vario Pliers
Like most things, the Prym Vario Pliers are incredibly simply to use once you know how! This little tutorial is a collaborative effort – I’ll supply the ‘how’ – you get to insert the jokes and euphemisms! Ok?!
You can now get just a set of the pliers with the right heads in a special ‘Love’ kit :


The snaps themselves come in a range of colours and a variety of shapes; I used the red assortment ‘circle’ pack.
I definitely recommend practicing on a scrap piece of fabric first! Preferably the same thickness of fabric you’ll be using in your project.
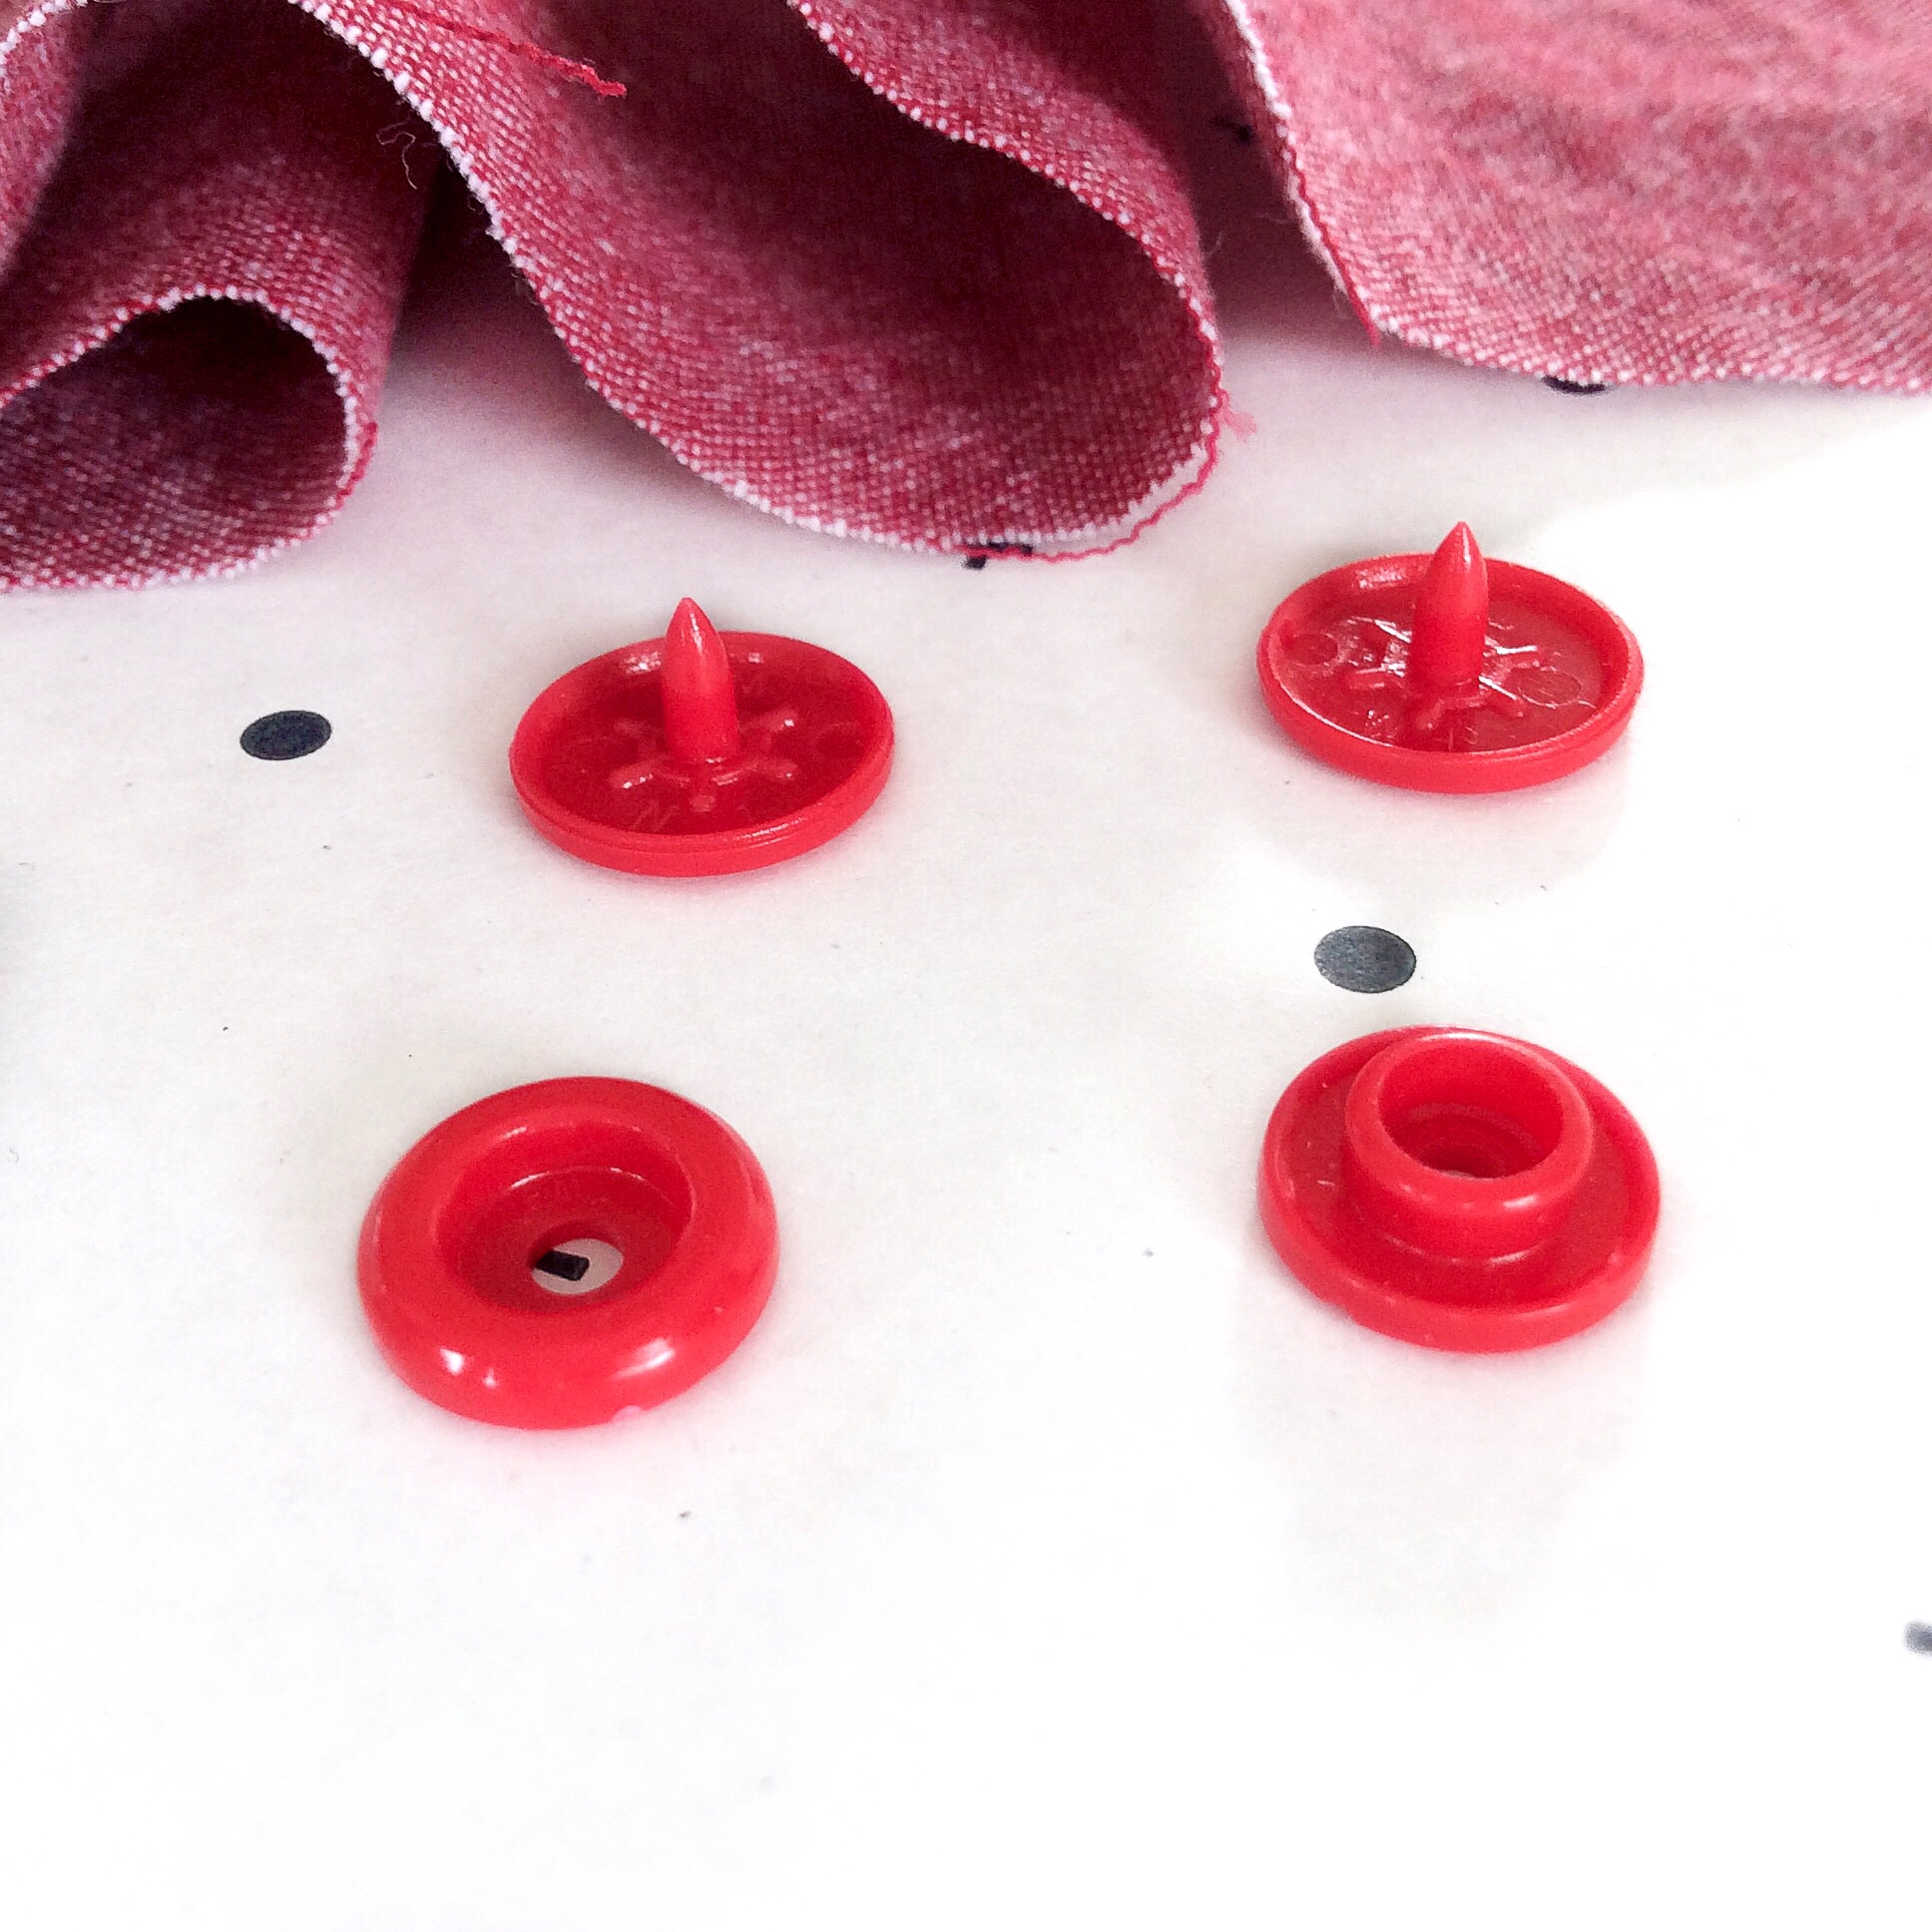
There’s a ‘female’ and ‘male’ under segment to each snap, which the fabric gets sandwiched between. They look like the pic below when they’re paired with the top shape (the bit with the long prong):

So, firstly, put your attachments into your plier; the top is a clear silicone piece with a small hole running through its centre. The bottom is a white plate that holds the snap head.

Next put one of the top snaps (the one with the prong) onto the white plate…

…and put it through your marked hole (I describe how I lined up and marked the snap holes on the dress itself on the dress blog post HERE).

Then place the ‘female’ part of the snap over the protruding prong (insert your own smutty joke here ;-))

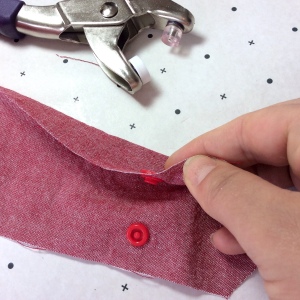
Then the fun bit … SQUEEZE!!! What the plier effectively does is squeeze the two components parts of the snap together, securely sandwiching the fabric between. What it also does, essentially, is squish down and flatten that now defunct extra prong length. The snaps won’t, err, snap closed together without this.

Repeat the whole process for the corresponding underside snap. Remember, if you’ve used the ‘female’ snaps on top, you’ll need the ‘male’ ones underneath. Use your own euphemism here to help you remember!

Really simple huh?! I hope I’ve explained it clearly enough; let me know! (If you’re tempted to have a go, as I say, links for everything can be found here). I now want to add snaps to all the things! If you see me with a pair of pliers in my hand, unless you want to be snapped, probably better to keep your distance for a while!
Until next time, happy sewing – and snapping!

For more regular sewing chat, you can find me on Instagram at @sewsarahsmith
Disclaimer : This tutorial is not a sponsored post. Some of the links given are Affiliate links – if you choose to purchase via an Affiliate link, you will not be charged any extra however I may receive a small commission x).

So glad it was helpful Anne! X
LikeLike
Thanks Sarah, you explained how to fix Prym snaps perfectly. I couldn’t find any clips on the subject, then I came across yours, wow what a relief.
LikeLiked by 1 person
[…] jeans buttons. (If you’re unsure how they’re installed; I use the same method as in my Snap tutorial – no hammer […]
LikeLike
[…] how I do them, I use an awl and my Prym Vario Pliers – you can read my quick tutorial on them here). The rivet packs I bought – blackened bronze and silver – come with the correct heads […]
LikeLike
Woohoo have fun Claudia! Xx
LikeLike
Just read this after seeing your Jenna Cardi. Your instruction are so clear – and not a little funny 😂. Now I just have to wait for my snap tool and snaps to arrive – what fun!!! 👍Xx
LikeLiked by 1 person
[…] (If you’re looking for a simple tutorial on how to fit plastic snaps on your Jenna, I have one HERE). […]
LikeLike
Thanks Sarah! Hahahaha yeah yeah!! Xxx
LikeLike
I have a niece who belongs to my Sister-in-law. First time from my side and for my Sister. It’s so exciting! Loving making baby clothes! xx
LikeLike
That’s what I thought too!!! Then I got confused about which attachments to use with the plastic ones and then eventually figured it out :-))
LikeLike
Thanks Sonja, I agree a ruffle is a sweet touch plus they’re so fun to do aren’t they. Xxx
LikeLike
Thanks Kathleen! I think your idea sounds lovely! I think snaps possibly are a better option for some Makes; tim sure you’ll be ‘snap happy in no time! X
LikeLike
Oooh fab, how did you get on?!?!
LikeLiked by 1 person
Aw thanks Anya love! I was totally confused by them as well. I mean, lets face it, it doesn’t take a lot but yeah I was a bit baffled. And then when the ‘penny dropped’ i got a bit overexcited. I think perhaps I need to get out more!!! Xxxxx
LikeLike
Ah thanks Jo!! Xx yeah the ruffles cute isn’t it. I totally agree, snaps are a great alternative when you don’t feel like doing buttons and actually I guess they’d be more practical if you were sewing up a lightweight blouse or something? Yeah chambray a dream to sew isn’t it. (Loved your Winslows too) xx
LikeLike
Oooh I’d be really dangerous with an hammer! the family would run for cover! Thanks love xxx
LikeLike
Oh Maria, thank you so much – that’s very kind of you xxx
LikeLike
Haha – I could barely keep a straight face typing it – but I couldn’t think of any other phrasing! Once you snap, you’ll never stop! 😉 xx
LikeLike
Oh they are! You’ll. e adding snaps to everything then Emma – how exciting! Is it your first time being an Auntie? X
LikeLike
It’s too cute! I’ve bought a popper gadget recently as my sister is having a baby and they’re essential on baby clothes aren’t they?! But now i just want to put them on everything!
LikeLiked by 1 person
Great post Sarah, snappy! I know it’s good because now I want to try snaps! With or without double entendres. xxx
LikeLiked by 1 person
I always get the impression that comments on Minerva kind of get lost, so I came here to tell you I absolutely love this dress! It’s gorgeous and looks great on your daughter 🙂
LikeLiked by 1 person
Love your “Snap Chat” Sarah! I did laugh at how you did demos in front of all your family as they looked on bemused!! I love snaps but have only ever attached them with a hammer before – so this is a really motivating post, thank you!
LikeLiked by 1 person
Your daughter is so cute! I love the ruffle on the bottom. Chambray’s probably my favourite fabric to work with – it’s so satisfying the way it presses beautifully and behaves so well when you’re sewing it up! Thanks for the Snapchat too; definitely worth looking at for when my buttonhole foot is playing up!
LikeLiked by 1 person
I am not surprised she wanted a shirt dress! It is really pretty and she does look like a princess. I love your snap tutorial. I always avoid them because they confuse the heck out of me. So I will be referring to this later 🙂
LikeLiked by 1 person
Fantastic snap tutorial, i’m off to try them out 🙂
LikeLiked by 1 person
I have a box of these snaps but I’ve never used them (in a bunch of colours as well) and every time I see them used like you’ve done on your daughter’s dress which SO adorable I think I must give those a go. I’m going to make up a sleeveless blouse for myself with a placket in the back neckline and I think a snap would be nicer (and easier) than a button and loop. I’ll bookmark your tutorial for when I get there!
LikeLiked by 1 person
What a beautiful, sweet, girly pink dress. The ruffled hem is always a cute detail on a girl’s dress.
LikeLiked by 1 person
That dress is so lovely, she looks gorgeous in it. Great tutorial, I have the pliers set but it came metal poppers and rivets, I didn’t realise you could do these snaps too.
LikeLiked by 1 person
Wow 😍😍😍 it’s so beautiful. I love the ruffle along the hem! Thanks for the fab snaps tutorial – I’ve never used them before but now I think I’ll give them a go as they don’t sound too scary. Smutty jokes?! Male/female snap parts? Prongs? Don’t know what you mean 😂
LikeLiked by 1 person