
Ok, so you’ve got a new Cricut Maker machine or you’re pondering getting one? I thought I’d elaborate on my first Cricut blog post (What Does a Cricut Maker Machine Do, Exactly?!) and chat about what tools and accessories you might want to go with your Maker in order to get the most out of it! Let’s face it, a sewing machine without thread or needle isn’t going to produce much, and this is equally true of your Cricut!
Of course what you might need / want largely depends on what you’re planning to use your Maker to, well, make. So, I’m going to talk from my own viewpoint; that is, mainly as a maker of clothes who’s just discovered a passion for all things crafty generally!
I’ve put everything under separate Headings, so you can skip to read the bits you’re interested in 😉
Let’s start off with the biggest thing…
THE ‘EASYPRESS’
This is the one item so far that I really recommend getting if a) your budget allows and / or b) you’re planning to use any of the iron-on vinyls, infusible inks or printable iron-on vinyls to customise your clothing or fabrics.
So what is an EasyPress? It’s basically a flat iron (it comes with its own protective base plate ‘cos this beast can get hot). Why would you need an EasyPress over a regular iron? Well, there are quite a few reasons I’ve discovered!

First and foremost is its base shape and size. Its ceramic coated surface is completely flat, edge to square edge – unlike the base of your iron which is pretty much triangular and full of steam holes. Even if you turn your irons steam function off, its base surface is still not entirely flat because of those holes – ideally it needs to be in order to evenly distribute heat to the vinyl you’re applying. The size of the EasyPress base plate also means you can heat press your vinyl to your fabric in one press, rather than having to move the iron backwards and forwards across the design. Not only would this run the risk of disturbing the vinyl underneath but would also mean that its not subject to constant, even pressure and heat which runs the risk of negatively effecting its transfer and its longevity.

The EasyPress also has sophisticated temperature and timing controls! Not all vinyls transfer at the same temperature or need the same duration of press. The EasyPress has a companion interactive website guide which allows you to input what vinyl or infusible ink you are using and what base fabric you intend to transfer it on (see HERE). The EasyPress Heat Guide web page then tells you exactly what temperature to set your EasyPress to. (If you’re based in the UK / Europe just make sure to toggle the option across to degrees Centigrade rather than Fahrenheit!) The Guide also gives step-by-step instructions to walk you through the application, i.e. when to remove the peel-away backing etc. I’ve got the Heat Guide saved to the taskbar on my laptop for easy access.

The timer on the EasyPress is also really useful; I was amazed at just how ‘off’ my ‘one-thousand, two-thousand..’ method of counting seconds was, haha! Plus how quickly my mind wanders when counting “…did I lock the car door this morning? Where’s my coffee? Oh hang on, I was meant to be counting!” I guess that’s why we’re told to count sheep when we can’t sleep, eh? Forget that, the EasyPress bleeps when the time is up and brings me back to reality thereby stopping me melting whatever I was doing!
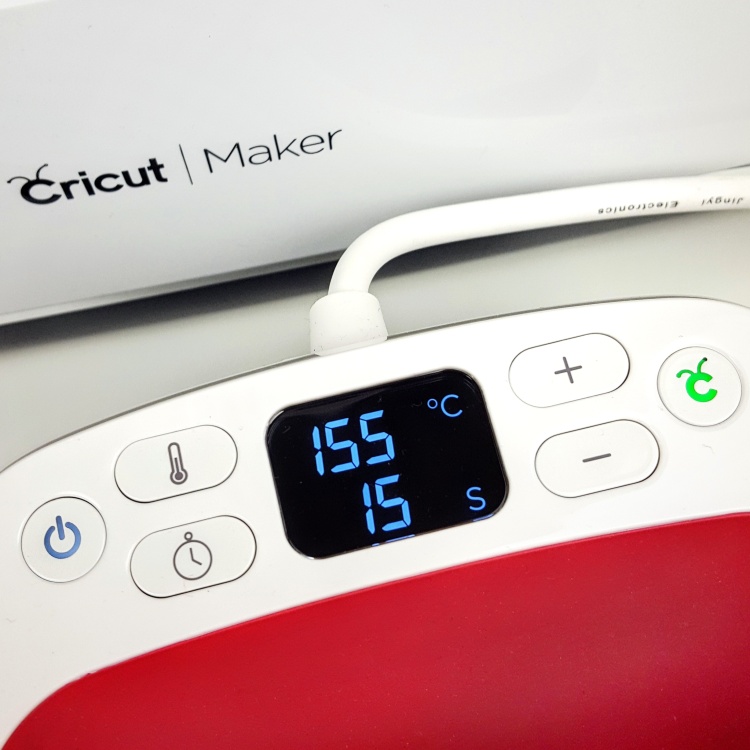
The temperature the EasyPress Heat Guide gives you depends on whether you are laying your fabric over a designated EasyPress mat or a folded towel. You can use either but the mat has proved really useful – it helps transmit heat back into the fabric from the underside as well as providing a stable, resistant and even surface.
Having a stable surface is crucial; again it’s all about applying even pressure – I currently place my EasyPress and mat on top of a wooden stool whose legs wont give way with pressure applied! (I’m already planning to build some extra storage and work surfaces to my sewing / craft space!)
If I’m making this sound complicated, let me say it really isn’t. The EasyPress also comes with a starter project to, y’know, get you started. Although mine literally got me stuck! In my eagerness, I applied the vinyl wrong side up so it stuck to the EasyPress rather than to my fabric; I laugh now but I didn’t then! Thankfully, it was easy to clean off the base plate once it had cooled down (anybody else use these Magic Eraser cleaning sponges?! Great for cleaning irons or indeed any surface – I always have a job lot stashed around the house!)

The EasyPress 2, which I have, comes in three different sizes 12” x 10”, 9” x 9” or 6” x 7”. I have the smallest of these three and it’s fine for the kind of decals and print and cut designs I’ve been working with. However, if I wanted to make larger decals, I might consider sizing up in the future. It also comes in a teeny-weeny baby version!
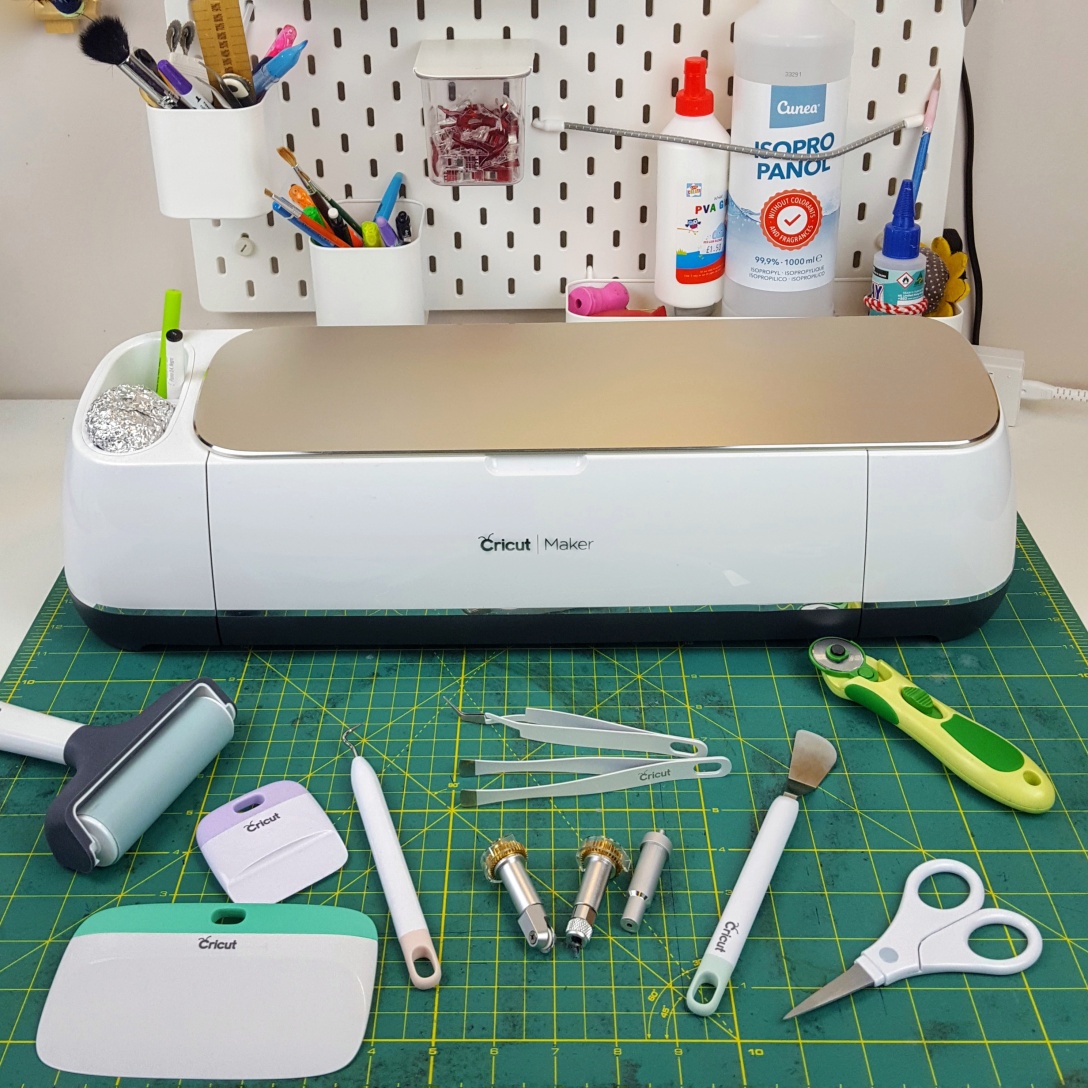
BLADES / CUTTING & WEEDING TOOLS
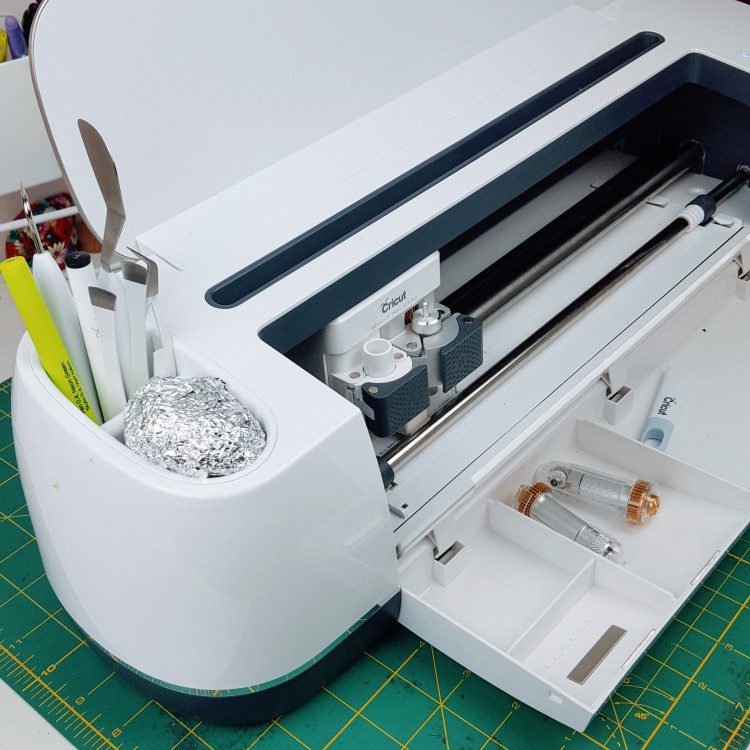
The Maker comes with a couple of cutting blades; the Fine Point Blade which intricately cuts through things like cardstock and vinyl and the Rotary Blade, which goes through fabrics. If you’re looking to work with thicker materials, you might want to consider purchasing, as I did, the extra-deep Knife Blade which cuts through other materials as dense as 2.4 mm!
A lot of the Maker blades have a changeable housing system; meaning you only need to swap out the tips rather than the whole shebang. There are loads to choose from, again depending on what you want to achieve, but including a scoring wheel, wavy decorative blade, debossing ball or precision debossing tip and an engraving tip for example.

Tools for Weeding – i.e. lifting off the negative space vinyl from the backing of your cut design. I’ve found the Weeder tool itself most useful, together with a pair of standard tweezers (and not the reverse tweezers, which I know others swear by; my head and hand simply refuse to coordinate!)
Brayer and Scrapers – I’ve also bought a brayer and the larger of my two scrapers. The brayer is a rolling device which smooths out bubbles in either your fabric or vinyl when you’ve placed them on the cutting mat ready to be fed through the machine (think of it like a mini Steam Roller flattening road surfaces or … perhaps don’t!). The scrapers are used to aid the transfer of vinyl or cleaning off your cutting mats.
A Rotary Cutter and Craft Knife (or the Cricut own brand ‘TrueControl Knife’ ) are also useful – I use my craft knife to score vinyl in one corner of a cut design to enable me to start the separation between the vinyl and its backing sheet. Obviously its also really good for things like cutting through card and sections of vinyl sheets.
A Lint Roller – yes, really. It’s useful for removing fluff from your fabric surface prior to applying either your vinyl or particularly when working with Infusible Inks.
A BRIGHTPAD
Ah I really like my BrightPad! It’s basically a slim electronic chargeable LED light pad which is really useful for illuminating through your vinyl sheets to reveal the fine lines of your cut design, thereby making weeding that much easier! It’s got five brightness levels; from normal to…blinding! My daughter also likes it for tracing pictures. As I mentioned in my first Beginners Guide post, there is a USB port to the side of your Cricut and a docking station atop so you can plug the Brightpad from there if you need to.

I haven’t tested this but apparently its really durable and drop proof. In fact so keen am I not to test this claim, I’ve sewn up a quilted case for mine!

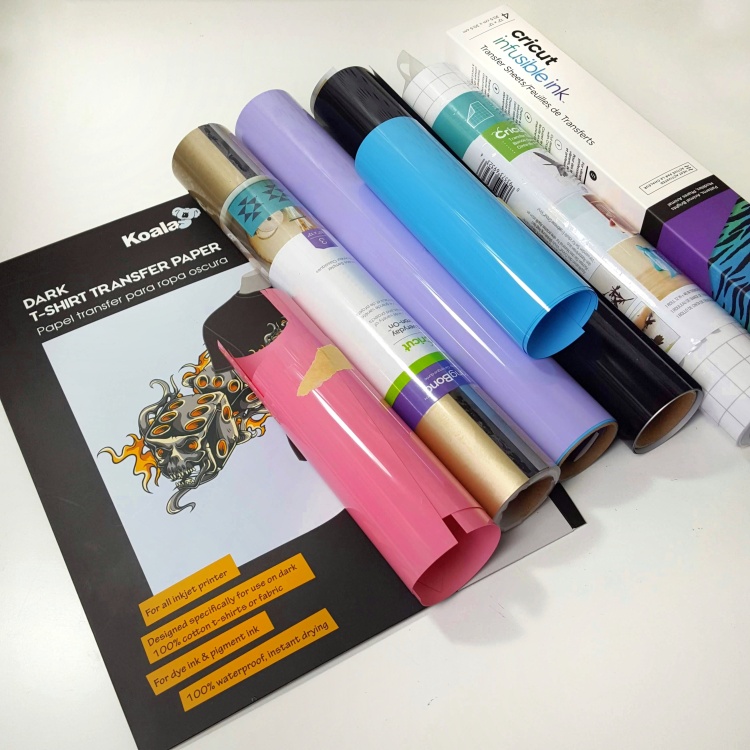
VINYLS & INKS
There are a number of different vinyls out there for different application purposes in a variety of finishes. In terms of finish, these range from coloured plains, holographic, patterned, glitter and textured. What you need to be particularly mindful of is the type of vinyl you need for your project; here’s a quick run through :
- Premium vinyl comes in either ‘Permanent’ or ‘Removable’ and is great for decals and creating stencils.
- Iron-on vinyls from Cricut include two main types, the ‘Everyday’ and ‘Sportflex’. Sportflex is designed for really stretchy sports (polyester) clothing; I’ve used Everyday vinyls on stretch fabrics with minimal stretch with success – apparently, it works best on fabrics with at least 60% cotton fibres.
- Transfer Tape – this clear sticky transfer sheet that allows you to transfer and combine different coloured elements of your design onto one backing sheet for ease of application. (You can layer vinyl but it’s best to do this in separate applications and reduce the press time).
- Infusible Ink – Cricuts’ infusible ink sheets come in lots of colours and designs in a roll with two sheets; one generally a pattern (i.e. roses) and the other in a matching block colour. Your fabric needs to have a very high polyester count for these inks to transfer (Cricut also make their own white sublimation ‘blanks’ – everything from coasters to bags and clothing.)
- Printable Vinyl – I mentioned this in my first Cricut blog post. You can basically design whatever you like and print it out on this plain vinyl, prior to heat transferring to your fabric. It only works with inkjet printers though – don’t use with a laser printer! In terms of printable vinyl look for the stuff for ‘dark’ fabrics as it works much better even if you’re intending to apply to a light fabric.
CUTTING MATS
Whatever material you are using, if you want your Cricut to cut it for you, it will need to be placed on an appropriate cutting mat. They range from ‘Light Grip’ to ‘Heavy Grip’ and, yes, there’s a ‘Fabric Grip’ one too. I find the green ‘Standard’ mat works well for most things. The mats are 12″ x 12″ but there are extra large 12″ x 24″ ones too which will be better for larger projects / cutting fabric pattern pieces for upcoming sewing projects!

OTHER USEFUL CRAFTY STUFF
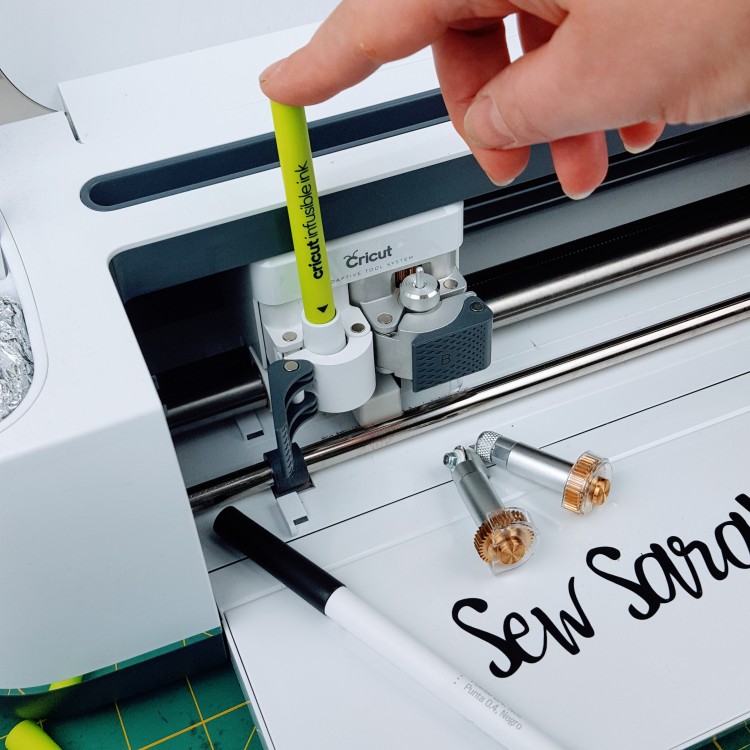
Pens – the Maker has a housing to hold your cutting blade. It also has an adjacent pen holder, meaning you can use your Maker to write and draw with! There are masses of pens to choose from in loads of colours; there’s also a washable pen for marking fabric – I’m curious to give that a try! There’s Infusible Ink Pens too which can be used to draw direct onto fabric – my understanding is that Infusible Ink sheets only work on fabric with a high polyester count, so I’m guessing these pens are the same. They would also need ‘setting’ with an EasyPress.
Acid Etching Cream – I’ve recently had a go at etching some drinking glasses. I started off by creating a vinyl Stencil in Cricut Design Space (the Makers’ companion design software). I applied this to a drinking glass (cleaning with 99.9% rubbing alcohol first) and then applied Armour Etch. You need to keep the cream moving over your stencil continuously with a flat, short bristled brush; I found to get a truly opaque finish took about 6-8 mins of application. Once this time is up, you just rinse it off, rub over with the alcohol again and voila, really cool etched glass!

Making this for my son has stopped him using glass after glass and leaving them all around the house; he just uses this one now!)

Hot Glue Gun – this Hot Glue Gun is in my basket. In fact by the time you read this, I’ve no doubt purchased it and used it a zillion times already. Possibly an exaggeration. But yeah, I’ve actually been daydreaming about this Glue Gun – crackers or what?! I really want to have a go at making paper flowers and card making so this is going to be really useful (I’m probably just going to sear off my fingerprints!)

Phew! That turned out to be a bit of a list eh? Of course, the actual list is no doubt endless but these are the things that have got me excited in using my Cricut Maker so far! But, for now, I think I’ve waffled on long enough; I’ve got stuff to make! (I’ve just made this green Elliot sweater which I’ve added a couple of vinyl decals to – I’ll be posting more pics of that to my Instagram.)
Do you have a favourite or indispensable crafting / Cricut tool or accessory? If so, do please let me know; I so love a gadget!
Next up, I’m going to be uploading more PDF sewing patters to my Cricut Design Space (and have a go at converting and uploading some small paper sewing patterns too!) – I’ll be showing you how I get on with that and what I’ve made, next time!
AND UNTIL THEN, happy sewing … and crafting!
*Disclaimer : this is a Sponsored post – I was given the Cricut Maker machine; the EasyPress machine and mat; some tools and consumables, for review purposes. I purchased additional tools, the BrightPad and a lot more consumables. All words, images, content and opinions expressed are wholly mine and are my honest and considered views. Some of the links given are Affiliate links – if you choose to purchase via an Affiliate link, you will not be charged any extra however I may receive a small commission x).

[…] : I have an additional ‘Cricut Tools & Gadgets’ post and a step-by-step tutorial on how to upload pdf and paper sewing patterns into Cricut’s […]
LikeLike
[…] about my new Cricut ‘Maker’ machine (an intro / overview HERE and a guide to tools HERE) but perhaps this may be the one most useful for us sewists; how to upload sewing patterns into […]
LikeLiked by 1 person
oh bless, what a faff!! Though the mental image of you both doing that kind of makes me smile! Another trick you might want to try is to lightly dust the surface of the vinyl (the side you’ve just cut) with talcom/baby powder. I haven’t tried this but apparently it settles into the tiny cracks enough so you can see them!! Worth a try, eh!!! xxx
LikeLiked by 1 person
Hi lovely … so far so very good. apparently the vinyl is supposed to survive 50 trips through the washing machine before showing signs of ageing. I’m letting them air dry rather than putting them in the dryer. Great for kids (and grandkids!) – I find myself looking at doing house decor things now too; as you say … another rabbit hole to fall down! it helps to have a decent grasp of software for the designing element but it’s also pretty easy to learn. xxx
LikeLiked by 1 person
Another rabbit hole to fall down! I had been wondering if it was something that I needed. I have already been down the papercrafts route before I got back into sewing, so it is mainly seeing related things I am interested in. How do the heat applied vinyls survive laundering? It would probably be things for the grandchildren and their stuff gets well tested in the laundry process
LikeLiked by 2 people
oooh thank you Rosie!!! I’m hunting silicone guards tight now, thank you for that. they’ll probably help with pressing too I’m guessing – I’m always burning my fingers!!! ((MY enthusiasm us showing no signs of wavering; just to warn you!!!)) xx
LikeLiked by 1 person
Thanks for a great read. I have an old version of the Cricut and someday (probably soon, if your enthusiasm continues !) I’ll get a new one. As for the glue gun – Prym make silicon finger guards which are fantastic at protecting your fingers !
LikeLiked by 2 people
Thanks for this blog post Sarah! Very informative! I’m saving for a heat press and light pad for sure! We had fun (Not) weeding the candles The other day with a torch held under the vinyl held by me whilst Helena weeded from the top 😂 Light pad is a MUST!! Looking forward to hearing how you get on with uploading PDF’s xx
LikeLiked by 2 people