
Hi! I’ve finally got around to writing this post having been bed-ridden for 9 days straight with the worst flu I’ve ever had – I say flu, but I really don’t know – it was the weirdest case of flu ever! But thankfully I’m back to normal now (‘normal’ being a relative term, obvs!)
[*EDIT : this post has been amended retrospectively to take into account, lessons learned since initially writing it!]
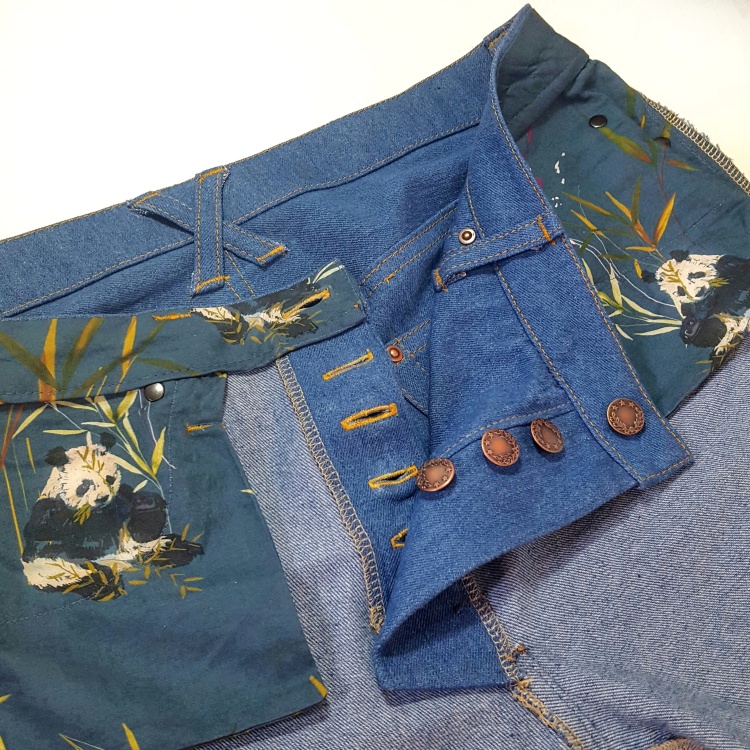
I’ve sewn a few pairs of skinny jeans in my time (using the Eleanore stretch pants pattern by Jalie – see here) but I really felt my wardrobe was lacking a relaxed pair; my last RTW ones having finally fallen apart! The Morgan ‘boyfriend’ jeans have a traditional coin pocket and button fly and are suited to a roll-up hem – in other words, exactly what I was looking for. PDF duly purchased!
Have you sewn jeans before? If not, are you intimidated by the idea? I’ve got to say from the off, in terms of actual sewing, making jeans is not difficult. And I found the Morgan instructions to be absolutely faultless; which of course helps – in fact, I find sewing jeans a methodical and therefore joyfully therapeutic process. All that lovely topstitching for example!
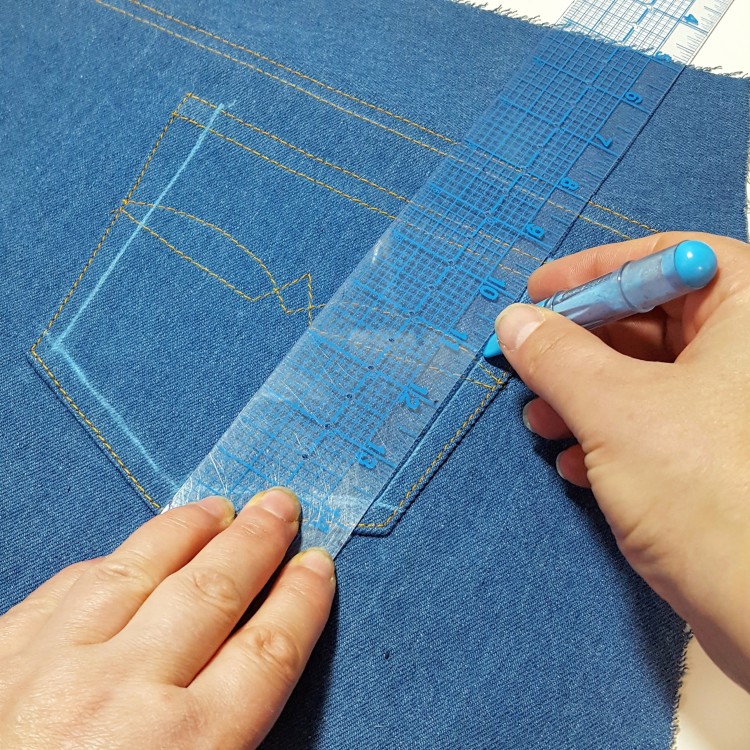
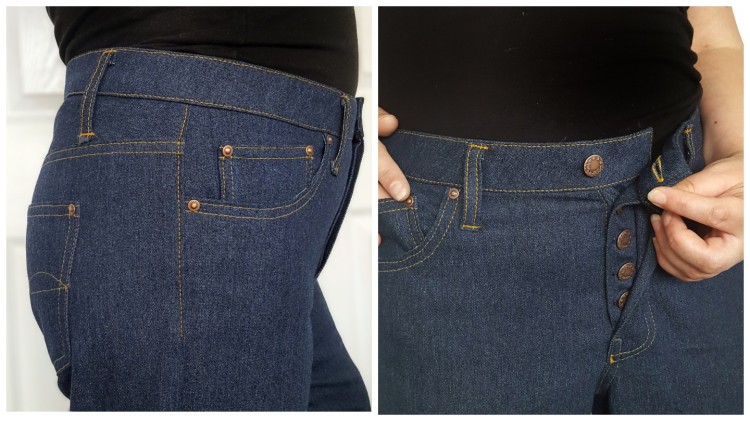
I will say, having the right notions and tools for the job really makes a difference though; I found my Hump Jumper / Bulky Seam Aid absolutely came into its own with this project, ensuring that my sewing machine foot navigated bulky seams with ease and ensuring that my topstitching didn’t ‘skip’. A seam guide (the 1/4″ mark is particularly useful) and a fabric marker (I used my Clover Chalk Pen) are also incredibly useful for marking your double topstitching lines so you can sew them equidistant. You will also need good quality jean topstitching thread (choosing your colour is fun in itself!) I used these rivets and these ‘laurel wreath’ jeans buttons. (If you’re unsure how they’re installed; I use the same method as in my Snap tutorial – no hammer required!)
To my mind, the hardest part of sewing jeans is not the construction; it’s not even, technically speaking, the fitting of the jeans – it’s accounting for the particularity of your chosen raw denim. Raw denim, being 100% cotton, tends to relax substantially throughout the day – so what fitted perfectly in the morning may be a baggy mess by the evening. Conversely, a pair that has marginal breathing room over breakfast fit beautifully come dinner – or so I’ve found! Which can make ‘seeing’ what fit adjustments you need to make that bit trickier!
The weight of your denim is really important then. I would say for this particularly pattern, you don’t want to use anything less than 10 oz. Mine for both pairs – was 9.5 oz – I didn’t think that half ounce would make a real difference but it does feel too lightweight for the cut of these pants – if I sew this pattern again, and I’m sure I will with further mods, I think I’d be looking for something substantially firmer – between 10 – 11 oz, as these are likely to have less ‘give’.
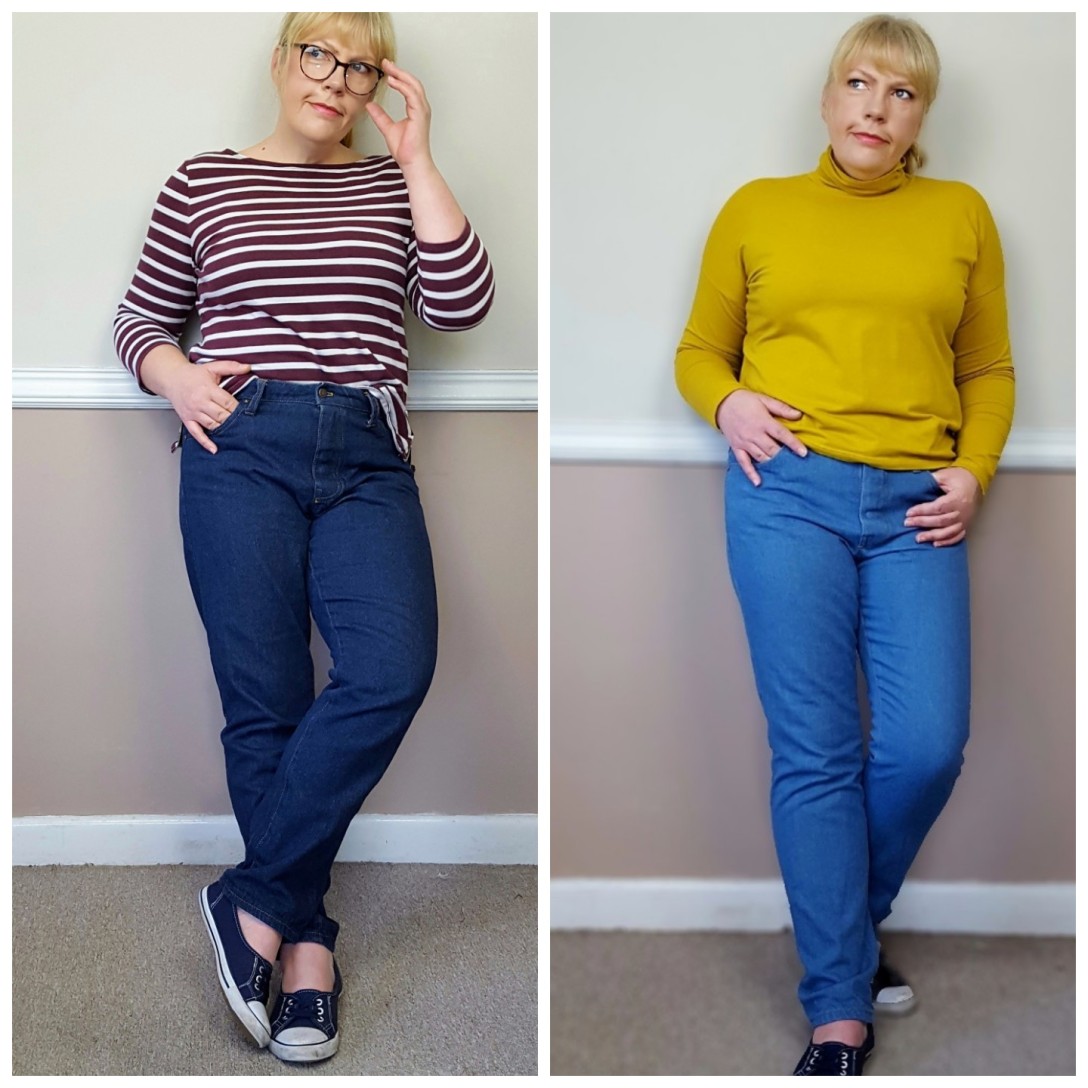
Let me talk you through my experience – I’ve sewn the Morgans twice now with different adjustments – and I’ve washed and worn both pairs loads…
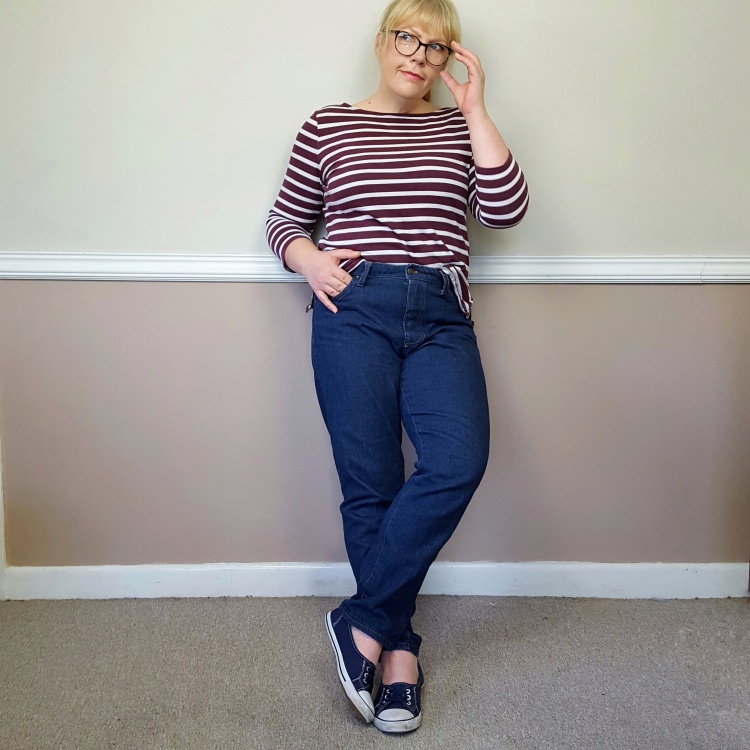
I sewed the darker of the two pairs first. They look a pretty good fit, right? Don’t be fooled – they aren’t, not after a few hours wear anyway!
For this first pair, I decided to size up – I think it was with the notion that this would give me greater room for fitting adjustments. Unless the denim you’re using is particularly heavy, I would stick to your actual size; I think this pattern is fairly generously sized (especially given that they’re meant to be drafted to account for the way raw denim grows).
You are instructed to cut out and then baste the whole lot together to determine the fit with each pair you sew. Strictly speaking I agree with this but, of course, I didn’t do that – it just felt like too much work. Instead, I constructed the fronts and back and then basted the yokes, waistband and side seams together. It was fairly obvious they were massive. I took out approximately 1.25” in total from each of the outer leg seams – and therefore 2.5” out of the waist. I sewed them together properly and was really pleased with them.
Until I properly wore them, that is.
By the end of the day the pants were falling down my hips*, the crotch had the typical sag ‘smirk’ and even the legs felt like they were flapping. If you check out the pictures in my Pona Jacket post – in which I’m wearing these jeans after a days wear – you will see what I mean! As a baseline, apparently 1.5” growth in your denim is about average/to be expected – which is a lot, right?! But I’m convinced this denim relaxes even more than that!
Undeterred, I quickly sewed up Pair Two in a paler colourway of the same weight denim (better the devil you know, right?!) This time I chose my true size (which is based on your actual waist measurement, not the final waist measurement, as these are meant to sit below your natural waist). I graded down a size at the hip, grading further down by shaving off half a size again from the front leg crotch seam in order to shorten the crotch length further.
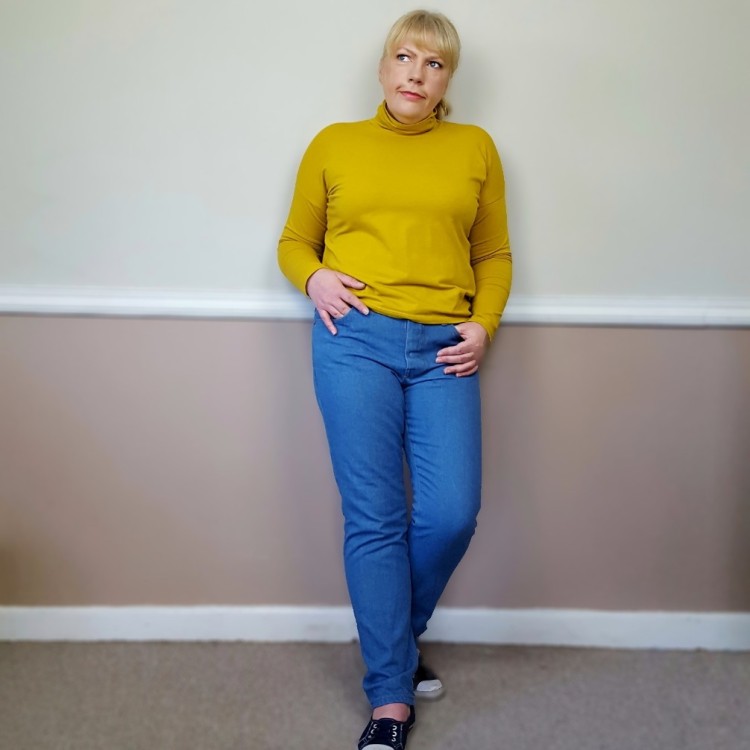
They felt a little tight but not overly so – given how much I knew this particularly denim relaxes, I was ok with that. They felt too tight at the calf though and I let them out 0.5” from the knee down.

*It’s taken a while but I think I’ve finally silenced the Fit Monster that resides in my head – I was blindsided whilst making these, focusing on fixing the after-effects – e.g. the saggy crotch, the drooping generally – rather than on the fit issue causing them to happen in the first place…namely, that the waistband needs more curve…
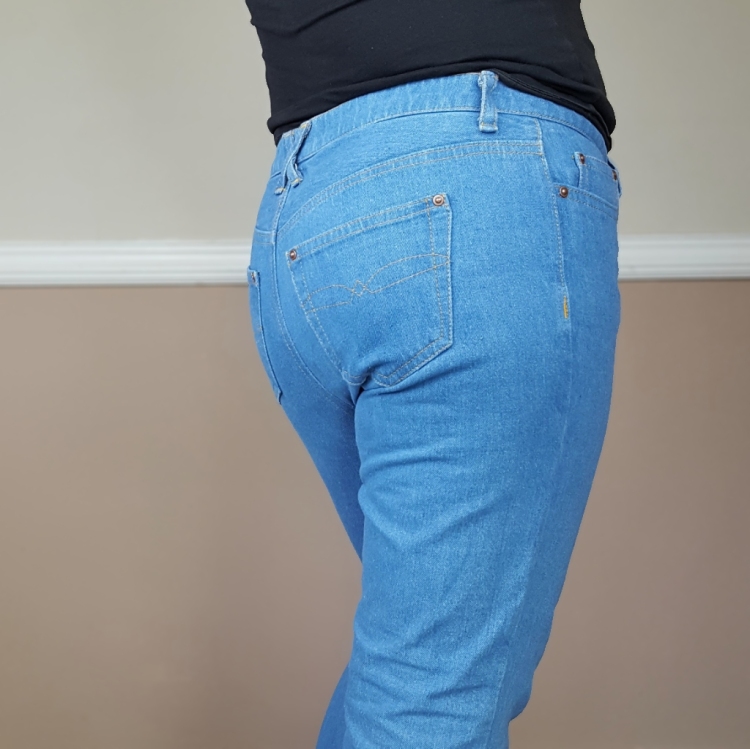
This would reshape that waist of the pants so that they simply cannot drop down my hips. I think the whole problem was acerbated by the simple fact that my hips are not that much bigger than my waist (sigh). And, happily, it is a relatively simple adjustment to make …

To conclude then, I love the way the Morgans come together – the pattern is an absolute joy to sew; the instructions are meticulous and fool-proof, making them a great introduction to sewing jeans. My only caveat would be to choose as quality denim as your budget allows, in a decent weight (around 10 – 11 oz) that won’t sag tiredly at the drop of a hat! And if you can, don’t be lazy like me and do baste everything together to determine what adjustments you might need to make – wearing them based together for a while to get a true picture – it’s a cost-saving exercise and good time investment in the long-run. Downloading – and reading – Closet Case patterns free pants fitting guide is also really helpful. I should have read that first and not after!
If you’re thinking about sewing jeans I hope this is useful? Also, if you have any words of wisdom / constructive advice to share – about the fit of my jeans or about sewing jeans in general – then please do in the comments – I’m an appreciative listener!
Now I’m off to sew a wrap dress in stretch velvet for the party season – starting with my nephews’ 21st birthday bash next weekend! I’ll try and post that next Sunday (but no promises, ‘cos you know … life! ;-))
Until then, happy sewing – and thanks for reading!
Disclaimer : Not a sponsored post – all fabrics, patterns and supplies were purchased by me. All opinions expressed are my honest and considered opinion. Some of the links given are Affiliate links – if you choose to purchase via an Affiliate link, you will not be charged any extra however I may receive a small commission, thank you! x).

Just came here to check out your review. They are so beautifully sewn, I just know my jeans will never look this good, your finish is impeccable!
LikeLike
[…] my own little pinafore dress to start with. I used a leftover scrap of denim from sewing up my Morgan Jeans which I customised with with my Maker and EasyPress to cut out and transfer some really cute gold […]
LikeLike
oh it’s such a minefield isn’t it!! But that’s interesting to note, thank you!! xxx
LikeLike
Denim’s such a lovely fabric to sew with, but the stretch/give thing is so hard to get right. I have a pair of Gingers I made in 11oz stretch denim – and they don’t give quite enough to eat a large meal – at the moment I can only wear them standing up! So perhaps the ideal denim is somewhere in between 🙂
LikeLiked by 1 person
ah thays really interesting!! thanks Valerie – do you mean the top of the back leg whete it hits centre back or do you mean the other side, ie top of the back leg crotch?? I know exactly what you mean – you can tie yourself up on mental knits teting to figure it out can’t you and I worry that adjusting one thing has a knock on effect in other areas too!!! xx
LikeLike
I went to one of Heather Lou’s Jean courses when she was in London and she told me to take out 2” from top of back leg which cured the problem you had. Enjoy making jeans but fitting trousers adjustments don’t always seem logical to me!
LikeLiked by 1 person