
Hi sewing buddies, I’m back with yet another Sew Over It ‘Whitley Top’. The reason? It’s all about perfecting fit!
If you read my previous post on this pattern, you will remember that I was pretty pleased with how the pattern fit straight ‘out of the envelope’, loving how it can be seen as something of a ‘block’, i.e. a basic shape that lends itself well to pattern redrafting and hacking. The Whitley Top is designed for non-stretch wovens and with this latest version, I wanted it semi-fitted; that meant I had to get the fit absolutely right. I re-took my measurements and went back to the drawing board!

So what alterations did I make? I adjusted for a full bust, full bicep, forward shoulders, a forward neck and a round back. Did that list just make you shudder at the thought? If so, let me reassure you – these are all super simple to do but make a huge difference to the finished garment. I had a habit, mostly unconscious, of irritably hiking tops back into the correct position; they wanted to rotate backwards. Realising what I was doing and figuring out what was causing it, has felt something close to an epiphany – it’s amazing just how much better a garment feels once it ‘sits’ properly on your frame!
Shall we take a quick look at the why’s and how’s of each of the fit alterations I made?

My starting point was purchasing the Palmer / Pletsch ‘Complete Guide to Fitting’. (it’s an updated version of ‘Fit for Real People’ which I also own). This book quickly became unputdownable. It lives on my bedside table, it follows me into the lounge; I’ll read it whilst waiting for dinner to cook. I don’t think I’ve taken it with me to the bathroom yet but I’m quite sure that day will come!
If you’re interested in learning about fit, I can strongly recommend it – not only does it cover a myriad of fit alterations in a really accessible manner, it also highlights the order in which adjustments should be made to your paper pattern. This is important because one fit adjustment can affect fit in another area and it’s so easy to get really muddled! For years, I’ve ‘blamed’ the size of my chest for most of my fit issues. Working through this book has revealed it is simply not so. Most of my fit issues related to my upper back!
Rounded Back Adjustment
There’s no escaping the fact that as I age my upper back is becoming more curved from the midline – no doubt due to the hours spent hunched over a keyboard in my working life and the hours spent over my sewing machine at home! The revised Palmer / Pletsch ‘Complete Guide to Fitting’ makes this, now common physical phenomena, one of it’s starting points when it comes to making fit adjustments.

A rounded back such as mine means there is likely to be insufficient length in the back bodice piece, which needs to be added in to stop garments from slipping backwards … and garroting me from the front neckline! The book covers a few ways of doing this adjustment depending on your particular level of curveture and the style of your back bodice piece. As the Whitley has a centre back seam, this was the method I used – :

This method does move the shoulder seam forward a little. However, not enough to compensate for the amount my shoulders actually forward rotate, so I also adjusted for that. But first…
Full Bust Adjustment
Ordinarily, with patterns drafted for a standard B cup, I would cut a size according to my upper bust measurement in order to get a good fit through the shoulders and neck and then do a Full Bust Adjustment (FBA). The Whitley Top certainly makes life easier because it comes with different cup sizes. However, even with the Whitley, because I wanted it semi-fitted and because my bust measurements put me inbetween sizes, I plumped for the C cup and did a small FBA. I then further lowered the bust dart.

Forward Shoulder Adjustment
The rounded back adjustment moves your shoulder seam forward a little bit. However, the forward curve of my shoulders is quite pronounced and my neck sits forward too, so, in order to get the shoulder seam aligned with the actual line of my shoulders, I added 0.5″ to the back shoulder seam, removing the same from the front : simple!

Adjusting the Sleeves – Forward Rotating
The Whitley has sleeves. Have you ever noticed that your sleeves hang with drag lines? I now realise it’s because the sleeve cap – and the shoulder seam it aligns to – were in the wrong position for my frame. Once I’d moved my shoulder seam forward – and matched my sleeve cap centre notch to that new seam position – my sleeve hangs so much better!

You will need to adjust your sleeve pattern at the underarm to get the underarm seams to align properly since the whole sleeve has been forward rotated; this is done by adjusting the sleeve seam allowance by the amount you rotated your shoulder seam forward – in my case that was 0.5″ – adding this value down the entirely of the back sleeve seam and removing it from the front.

Adjusting the Sleeves – Full Bicep Adjustment
That wasn’t the only issue with the sleeve. The last time I made the Whitley I made it in a stretch crepe, which made fitting a little more forgiving. However, I found the sleeves on the Whitley to be too slim fitted. Measuring the width of the upper sleeve pattern piece and comparing that to my upper arm revealed the need fo make a full bicep adjustment. I don’t have full biceps, I have ‘bingo wings’! (And does anybody know why we call them that?!) This is the first time I’ve tried this and I was really pleased with how it turned out. It’s a slash and spread method; a bit like doing a FBA only for your sleeves! Again, the book takes you through various methods step-by-step, so this for simple illustration :

I also removed 1″ from the overal length of the pattern as I’m something of a short-stack! I left the length of the sleeves as is, they’re meant to be ‘bracelet’ length.

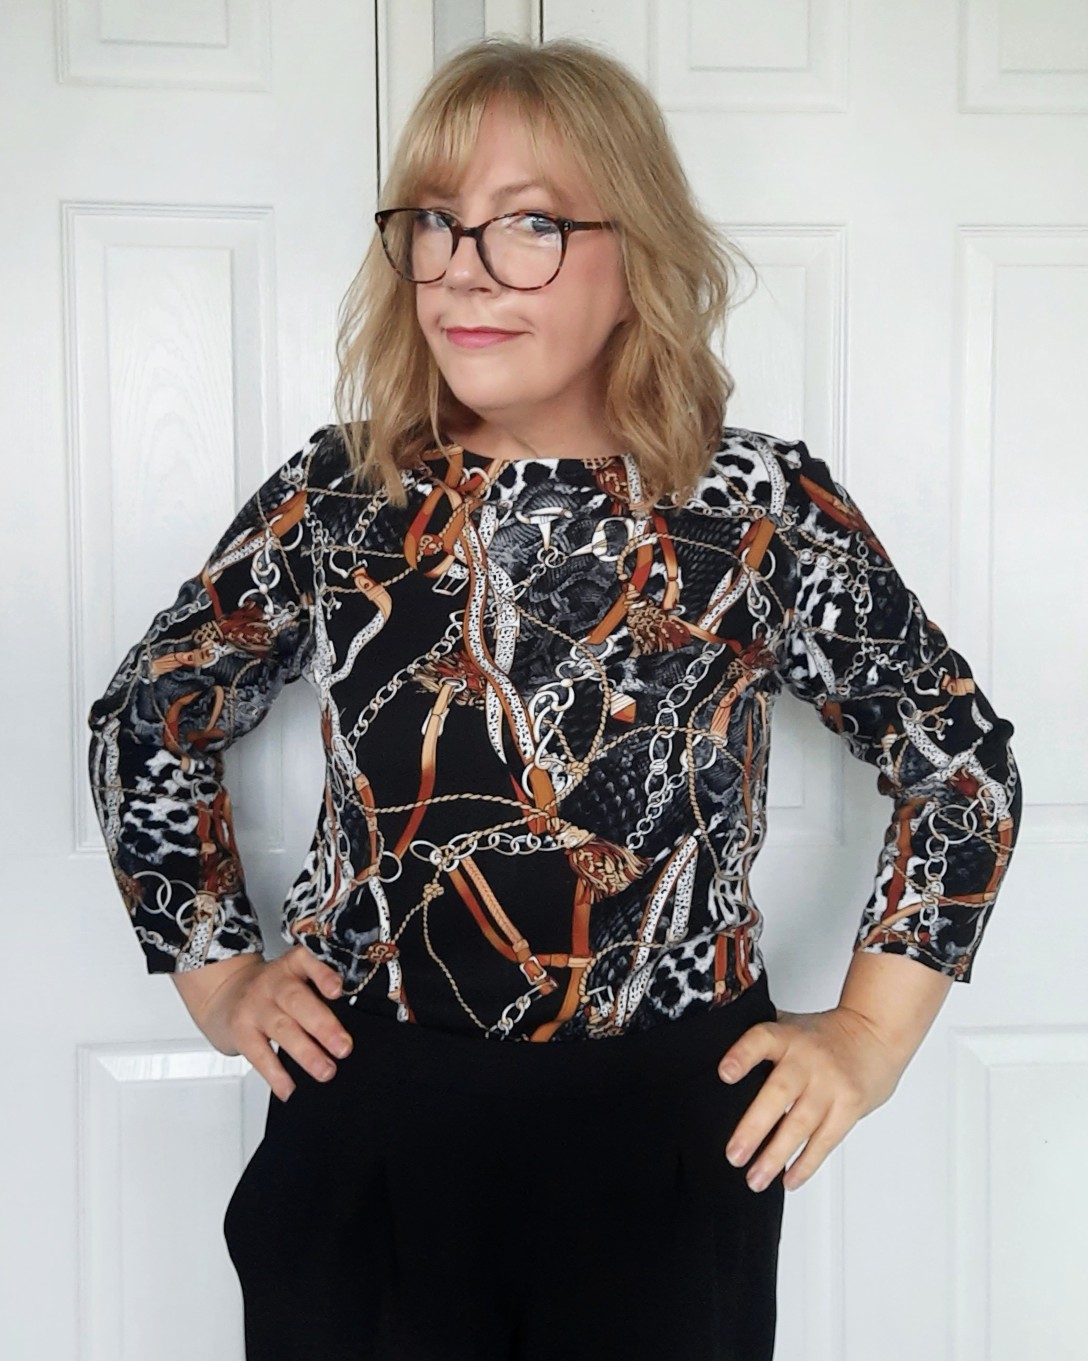
I’m so pleased with how this top turned out. It is extremely comfortable to wear; I think it’s fair to say, now I’ve got the fit exactly how I want, the Whitley is a staple top pattern I will reach for again and again. Especially with this neckline rather than the ‘V’ one – I think it’s a great way to showcase a great print. Talking of which, I just love this (Versace inspired?) ‘bridle links’ print; there’s something about it that makes me go all ‘School Ma’am’ when I wear it, haha! It’s a lovely quality viscose twill, a little heavier and more stable than a lot I’ve worked with. I bought it from Patterns & Plains – I don’t think there’s much, if any, of this left but understand there’s more designs coming printed onto the same base cloth, which I’ll definitely be checking out!
I hope you all continue to be well? I’m still having ups and downs and trying to ride the rollercoaster as best I can…sewing continues to help; I’ve just cut out some more lingerie and then I think I might be sewing all the dresses!
Until next time, happy sewing!

Disclaimer : Not a sponsored post. All items mentioned in this post were purchases. The post does contain affiliate links; if you choose to purchase via an affiliate link you will be supporting this blog at no additional cost to yourself, for which I thank you! Sarah x
LIKED THIS POST? Subscribe!


Hi Maureen, thank you for your lovely message – that makes me so happy to hear! It’s so encouraging to sew something that fits well isn’t it! Funnily enough, hook and eyes aren’t my favourite closure and u actually clamped mine permanently closed once I figured I could still get it over my head! 😉 on future versions I think I’ll use a fabric loop / button instead. As for the book, it’s great isn’t it!!! I have it on my bedside table! Xx
LikeLike
Thank you Sarah for both posts about the Whitley top. With some things I already knew and your info about fitting this pattern I have eventually made a woven top that actually fits. I think there are still some adjustments I need to make but my wearable toile is much better than any rtw garment and gives me hope for future dressmaking. The only hiccup I have is that the hook and eye at the back neck edge keeps coming undone. I think there may be an adjustment needed there but I wondered if you had the same experience. Oh and you should be getting commission from Palmer-Pletsch as I bought the book and told a friend who also bought it!
LikeLiked by 1 person
Haha me too! I love that about sewing – the always learning part! Though I love the light bulb moments more than the making mistake moments 😄 Oh go for it with the sleeves Janet; it’ll be great!!!
LikeLiked by 1 person
Hi Kathy … it depends on how much use you get out of the old book I guess … I have both and much prefer the new version; it feels more accessible somehow and I do feel there’s more fit method options as well as more of an emphasis on the posture problems we’re more likely to experience today; like a rounded back … but, yes, if the old book works for you then there’s probably no need to buy another 😉
LikeLike
Would you say the book’s worth buying if you already have the old ‘Fit for real people’ version. Is there new information that the old one doesn’t cover?
LikeLiked by 1 person
I love a deep dive into fitting! This top looks fabulous, and I’m glad your clothes are no longer strangling you 🙂 I have this book too, and went through a similar process with it on a sleeveless top this year, but I haven’t braved the sleeve alterations yet.
LikeLiked by 1 person
Thanks Nicola…oh I was sick of getting strangled by my clothes too … onwards and upwards on this sewing learning journey eh! 👊 xx
LikeLike
Thank you for this post. I had stopped making round necked tops as I felt they were strangling me didn’t even think about it being a fit issue. Might have to try the round back adjustment. Agree with the previous post it’s knowing what the problem is before you can fix it
LikeLiked by 1 person
Anita that’s so kind, thank you so much. I hope you find the book useful too x
LikeLike
So informative! Thank you for taking the time to share this! Definitely sounds like I need to be purchasing this book! You are inspirational. X
LikeLiked by 1 person
Thank you so much Sabrina! Your comment is so lovely and has just made me grin from ear to ear!! And yes, that’s what I initially thought about my FBAs too … its truly liberating to finally get my head around the real issues! Xx
LikeLiked by 1 person
Whoopsie! Just tried to leave a comment but it disappeared when I logged in, so here’s hoping you don’t get two versions!
Just wanted to say thanks so much for this great post! I was reading through it squealing “that’s me, that’s me!” As I got to each fit issue you encountered. However I’ve never joined the dots, so only just assumed I was doing my FBAs wrong.
This really is truly enlightening.
Thanks so much for your entertaining and informative posts. They’re always great.
Your top is amazing by the way and the print looks fab on you.
I hope you and yours are all safe and well
Sabrina
LikeLiked by 1 person
Hi Sarah,
Thanks so much for this great post. Reading through each of your fit issues, I found myself squealing, that’s me, that’s me!
Only I never did connect the dots and just kept on thinking I was doing my FBAs wrong…
The top is AMAZING by the way, and looks fab on you.
Thanks so much for writing such entertaining and informative blog posts and I do hope you and yours are safe and well
Sabrina
LikeLike
Thank you Andrea and yes that really is half the battle isn’t it! I do think making a simple top like this helps to make things a bit clearer … the book goes through making a fitted sheath dress to try and identify where our bodies differ from the pattern makers standard and I think I might have a go at that to see if it sheds more light on other issues…and adjusting one thing at a time I think helps too x
LikeLike
Great Post again! I have this book and numerous others too. The problem I find is actually looking at the garment on, and deciding what is the fit problem! Following the adjustments from the instructions is easy compared with that!
LikeLiked by 1 person
Hahaha of course!!!! I’ve got that vision firmly planted in my head now!! Love a bit of Bingo! Oooh itd make a nice Christmas present wouldn’t it; do let me know how you get on … I’ve a suspicion you’ll be amazed at how straightforward most of the adjustments are! X
LikeLike
Hi Sarah, thanks for, as ever, an informative and entertaining post! This book will make it on to my Christmas list – it’s time for me to stop avoiding fitted patterns I live the look of and get to grips with fit.
By the way, ‘bingo wings’ refers to the raising of the arm to shout ‘house’ at bingo and the consequent display of flesh! 🙂
LikeLiked by 2 people
Hi Sandra…I agree, the adjustments themselves are simple…once you figure out what actually is the cause of needing them; that’s the hard bit isn’t it!! I think the book has been my go-to sewing buddy really … but connecting with people on Instagram really helps too. Are you on there? It might be worth posting a pic of your issue on there and asking for advice? Our fellow sewists tend to be a helpful bunch!
LikeLike
You make it sound so simple. I suppose the starting point is assessing and knowing what the wee quirks are and knowing the tweaking sequence. I am plagued with fabric bunching under the arm on my sleeveless dresses. There’s so much info out there and it’s. So confusing, but I think I’ve narrowed it down to shoulder adjustment (slope of shoulder). Do you have a fitting buddy who knows what they are doing? Regards, S
LikeLiked by 1 person
Thanks Jan! I’m amazed at how much more comfortable I feel in this top, thankfully these adjustments aren’t too much of a faff to do – I think I’ll be doing the rounded back and forward shoulders adjustments to everything from now on in…I’d be really interested to know what you discover when having a go… and I hope all is well with you xxx
LikeLike
What a comprehensive and helpful blog (as usual!) I have avoided this designers patterns up to now as I felt they were not designed for shapes like mine, but I need many of the same amendments as you so I will reconsider. They all look good. This last one looks great. Thank you.
LikeLiked by 1 person
[…] It fit pretty much how I wanted it to without any major tweaking on my part – my only alteration being to lower the darts – considerably! 1.5″ to be exact. I like the drafting of it; there’s shaping to the waist and it hangs nicely through the back – even without doing a swayback adjustment! (I’ve since made a more fitted version of this pattern in a non-stretch woven, with extra fit adjustments, see HERE). […]
LikeLike
Thanks! No it doesn’t; it covers bodice, skirts and dress fitting mainly. I think there is a Pants for Real People book? Bit I also think Closet Core Patterns have a lot of great – and free – resources when it comes to jeans / trousers fitting too xx
LikeLike
Looks great Sarah
Does the book cover trousers and jeans too?
LikeLiked by 1 person